Unveiling the Mysteries of Dry Ice with fun experiments
Dry ice, the solid form of carbon dioxide, is a fascinating substance that can transform simple experiments into captivating science lessons. As a popular educational tool, dry ice provides an engaging way for children to explore the principles of physics and chemistry.
This article delves into 10 easy yet awesome dry ice tricks and dry ice experiments for kids, each designed to ignite scientific curiosity in young minds. From creating smoky bubbles to mini cloud formations, these activities not only educate but also entertain.
Below are perfect Dry ice experiments for kids to fascinate them
Create Fog with Water and Dry Ice
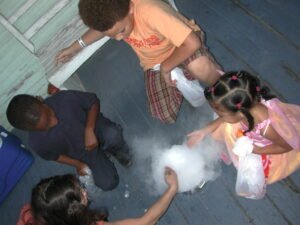
One of the easiest and most fun experiments you can try at home is creating instant fog using water and dry ice! All you need is a bowl of warm water and a few pieces of dry ice. Simply drop the dry ice into the water, and watch as the combination of water and dry ice creates a thick, mysterious fog that pours out of the bowl. The reaction happens because the warm water causes the dry ice to sublimate, turning it from solid carbon dioxide into gas, producing the classic fog effect. It’s perfect for parties, science experiments, or just a fun demonstration of how dry ice interacts with water!
Dry Ice Soda Pop Rocket
One of the most thrilling dry ice experiments for kids is the Dry Ice Soda Pop Rocket. Using a small plastic soda bottle, water, and dry ice, kids can create a mini rocket. By adding dry ice to water and sealing the bottle, the sublimation process builds pressure, launching the bottle into the air like a rocket. This fun and educational experiment demonstrates the power of gas expansion and is sure to spark scientific curiosity.
Dry Ice Painting
For a creative twist, try the Dry Ice Painting experiment. This is an artistic dry ice experiment for kids where they use paintbrushes dipped in warm, colored water to paint on dry ice. As the warm water touches the dry ice, it creates colorful, swirling patterns due to rapid sublimation. This activity not only teaches kids about the effects of temperature changes but also allows them to create beautiful, temporary art. It’s a perfect combination of science and creativity.
Dry Ice Bubble Spectacle Experiment
Creating a Dry Ice Bubble Spectacle is a fascinating and visually stunning experiment that is both simple and safe, with proper supervision.
Here’s a step-by-step guide to set up this experiment:
Materials Needed
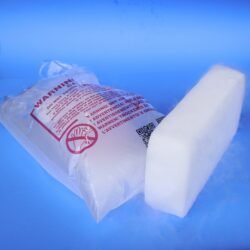
- Dry ice (solid carbon dioxide)
- Large bowl
- Warm water
- Dish soap
- Cloth or small towel
- Gloves and safety goggles (for handling dry ice)
Steps to Create the Dry Ice Bubble Spectacle
- Safety First: Wear gloves and safety goggles when handling dry ice. Dry ice is extremely cold (-78.5°C or -109.3°F) and can cause frostbite if touched directly.
- Prepare the Solution: Fill the large bowl with warm water. Add a few drops of dish soap to the water and gently mix. The soap in the water creates a film necessary for forming bubbles.
- Add Dry Ice: Using gloves, place a piece of dry ice into the bowl with the soapy water. Immediately, you will see a reaction where fog starts to form. This fog is a combination of carbon dioxide gas and water vapor.
- Create the Bubble Film: Wet the cloth or towel with the soapy water solution. Stretch the wet cloth across the rim of the bowl to create a film.
- Watch the Magic Happen: The dry ice will sublimate, which means it turns from a solid directly into a gas. As the gas expands, it will push up against the soap film on top of the bowl, eventually creating a large soap bubble filled with fog.
- Observe the Spectacle: Watch as the bubble grows and eventually bursts, releasing a cloud of fog. The spectacle is both mesmerizing and educational, illustrating principles of sublimation and gas expansion.
Mini Cloud Chamber Experiment
Creating a Mini Cloud Chamber is an educational and intriguing Dry ice trick that demonstrates the formation of clouds on a small scale. This experiment allows you to visualize the process of cloud formation using dry ice. Here’s how to make one:
Materials Needed
- A large, clear plastic container with a lid
- Dry ice
- Black construction paper
- Alcohol (isopropyl alcohol, 70% or higher)
- Tape
- Gloves and safety goggles (for handling dry ice)
- A flashlight or small lamp (optional, for better visibility)
Steps to Create a Mini Cloud Chamber
- Prepare the Container: Line the inside bottom of the clear plastic container with black construction paper. This will serve as a dark background, making it easier to see the cloud.
- Add Alcohol: Lightly dampen the black construction paper with alcohol. The alcohol will vaporize and contribute to cloud formation.
- Prepare Dry Ice: Using gloves, place a few chunks of dry ice into a separate shallow tray or the bottom of a different container.
- Assemble the Chamber: Place the clear container, open-side down, on top of the dry ice. Make sure the container is well sealed against the surface to prevent air from entering.
- Observe the Reaction: As the dry ice sublimates, it cools the air inside the container and the alcohol vapor condenses, forming a cloud. You can shine a flashlight or lamp through the container to better observe the cloud formation.
- Discuss the Science: Explain that this is similar to how clouds form in Earth’s atmosphere. Warm, moist air rises, cools, and loses its capacity to hold water vapor, which condenses into tiny droplets, forming clouds.
Colorful Acid-Base Reactions Experiment
The “Colorful Acid-Base Reactions” experiment using dry ice is an exciting and visually appealing way to teach about pH changes, acid-base reactions, and the properties of carbon dioxide. Here’s how to set it up:
Materials Needed
- Dry ice
- Universal pH indicator solution (available at science supply stores or online)
- A large, clear glass or plastic container
- Warm water
- Gloves and safety goggles (for handling dry ice)
- A stirring rod or spoon
Steps for Colorful Acid-Base Reactions
- Prepare the Indicator Solution: Fill the glass or plastic container with warm water. Warm water will create a more vigorous reaction due to faster sublimation of dry ice.
- Add the Universal Indicator: Add a few drops of the universal pH indicator to the water. Stir gently if needed. The universal indicator will change color based on the pH of the solution, providing a visual representation of the chemical reaction.
- Introduce Dry Ice: Using gloves, carefully add a piece of dry ice to the water. It will begin to sublimate (turn from solid to gas) immediately, forming carbon dioxide gas and creating a bubbling effect.
- Observe the Color Change: As the dry ice sublimates, it releases carbon dioxide gas, which dissolves in water to form carbonic acid. This acid will lower the pH of the water, causing the universal indicator to change color. Typically, the solution will change from green (neutral) to yellow (acidic).
- Discuss the Science: Explain the process of carbon dioxide dissolving in water to form carbonic acid, which is an example of an acid-base reaction. This experiment illustrates how carbon dioxide can affect the pH of an environment, a concept relevant in discussions about carbon dioxide in the atmosphere and ocean acidification.
Spooky Halloween Fog Experiment
Creating spooky Halloween fog using dry ice is an effective and theatrical way to add an eerie ambiance to your Halloween decor. The dense fog produced is safe and non-toxic, but it requires careful handling due to the extreme cold of the dry ice.
Here’s a step-by-step guide to creating your own spooky Halloween fog:
Materials Needed
- Dry ice (solid carbon dioxide)
- Hot water
- A large container
- Gloves and safety goggles (for handling dry ice)
- Tongs or a scoop
Steps to Create Spooky Halloween Fog
- Prepare the Container: Choose a location for your fog effect and place the large container there. If you’re using this indoors, ensure the area is well-ventilated as the fog is composed of carbon dioxide gas.
- Add Hot Water: Fill the container about halfway with hot water. The warm temperature of the water will interact with the cold dry ice, enhancing the fog production.
- Introduce Dry Ice: Using tongs or a scoop, carefully add pieces of dry ice to the hot water. Immediately, you will see a thick, white fog begin to form and cascade over the sides of the container.
- Maintain the Fog Effect: As the dry ice sublimates (turns from a solid directly to a gas), it will produce fog. This effect will continue as long as there is dry ice and warm water in the container. Add more dry ice and hot water as needed to maintain the fog.
- Enhance the Atmosphere: You can add to the spooky effect by strategically placing lights near the fog, especially colored lights, to create a mysterious and eerie glow.
Invisible Dry Ice Bubbles Experiment
Creating invisible dry ice bubbles is a fascinating and fun experiment that demonstrates the properties of gases and sublimation. It’s a great way to engage with basic scientific principles in an interactive manner.
Here’s how to do it:
Materials Needed
- Dry ice
- A large, clear plastic container with a lid
- Warm water
- Dish soap
- Gloves and safety goggles (for handling dry ice)
- A small cup or container
Steps to Make Invisible Dry Ice Bubbles
- Prepare the Solution: Fill the small cup or container with warm water and add a few drops of dish soap to create a soapy solution.
- Set Up the Dry Ice: Using gloves, place a few chunks of dry ice into the bottom of the large plastic container.
- Add Warm Water to Dry Ice: Pour a small amount of warm water onto the dry ice. This will cause it to sublimate faster, releasing carbon dioxide gas.
- Create the Invisible Bubble: Dip your hand (with the glove on) into the soapy solution. Then, reach into the container and touch the surface of the dry ice with your soapy hand.
- Observe the Effect: As the dry ice sublimates, it releases carbon dioxide gas, which mixes with the soap on your glove to form a bubble. However, since the bubble is made of carbon dioxide gas, it will be invisible, creating a unique and fascinating phenomenon.
Dry Ice Crystal Ball
Creating a Dry Ice Crystal Ball is a visually stunning and educational experiment that can be a great way to explore the properties of gases and sublimation. It’s a relatively simple process, but it requires careful handling of dry ice. Here’s how to do it:
Materials Needed
- Dry ice
- A large, clear balloon
- A funnel
- Gloves and safety goggles (for handling dry ice)
- A container or bowl
Steps to Make a Dry Ice Crystal Ball
- Prepare the Balloon: Stretch out the balloon to make it easier to fill. You can do this by inflating it a few times with air and then deflating it.
- Insert Dry Ice: Using the funnel, carefully add small pieces of dry ice into the balloon. It’s important to use smaller pieces to ensure they can easily pass through the funnel and into the balloon. You don’t need a lot of dry ice – a few chunks will suffice.
- Seal the Balloon: Once you have a decent amount of dry ice in the balloon (enough to cover the bottom when the balloon is laid flat), remove the funnel and tie the balloon securely.
- Observe the Formation: As the dry ice sublimates inside the balloon, it will turn from solid to gas, inflating the balloon. As the gas fills the balloon, it will create a foggy, crystal-ball-like appearance.
- Handle With Care: Handle the balloon gently. The dry ice inside is very cold, and the balloon will be more fragile due to the temperature difference.
Magnetic Levitation
Creating a Magnetic Levitation experiment with dry ice is a fantastic way to explore the principles of magnetism and superconductivity in a visually striking way. This experiment demonstrates how a magnetic field can interact with the properties of certain materials (like dry ice) to create a levitation effect.
Here’s a guide on how to set up this experiment:
Materials Needed
- A flat, smooth magnetic track
- Dry ice (solid carbon dioxide)
- Gloves and safety goggles (for handling dry ice)
- A flat piece of non-magnetic material to place the dry ice on
Steps to Create Magnetic Levitation:
- Safety Precautions: Wear gloves and safety goggles while handling dry ice to avoid frostbite and eye injury. Ensure the area is well-ventilated.
- Prepare the Magnetic Track: Lay out your magnetic track. The magnets should be arranged with alternating polarities to create a stable magnetic field.
- Prepare the Dry Ice: Using gloves, place a flat piece of dry ice on the non-magnetic surface (like a plastic or wooden board). This will be your levitating object.
- Initiate Levitation: Carefully position the dry ice above the magnetic track. The dry ice will levitate above the magnets due to the Meissner effect, which occurs in superconductors repelling the magnetic field.
- Observe and Experiment: Gently push the dry ice along the track. It should glide above the magnets with minimal resistance, giving the appearance of levitation. You can experiment with different sizes and shapes of dry ice to see how they affect the levitation.
The Science Behind It
- Meissner Effect: This is a demonstration of the Meissner effect, where a superconductor (in this case, the dry ice) will repel a magnetic field, allowing it to levitate above the magnets.
- Sublimation and Gas Cushioning: As the dry ice sublimates, it creates a thin layer of gas underneath, reducing friction and allowing the dry ice to glide smoothly over the magnetic track.
Popping Film Canisters
Creating Popping Film Canisters is a classic and exciting science experiment that demonstrates the principles of gas pressure and chemical reactions. It’s a simple and fun way to engage with basic physics concepts.
Here’s how to do it:
Materials Needed
- Empty film canisters with tight-fitting lids
- Small pieces of dry ice
- Water
- Gloves and safety goggles (for handling dry ice)
- A protective surface or outdoor area for the experiment
Steps to Make Popping Film Canisters
- Prepare the Canisters: Take an empty film canister and fill it about halfway with water.
- Add Dry Ice: Using gloves, add a small piece of dry ice to the water in the canister. The piece should be small enough to easily fit into the canister but large enough to create gas quickly.
- Seal and Wait: Quickly but carefully place the lid on the canister, ensuring it is tightly sealed. Then, place the canister lid side down on a protective surface or the ground.
- Observe the Reaction: Step back and watch. As the dry ice sublimates, it will build up pressure inside the canister. Eventually, the pressure will become great enough to pop the lid off, often with a loud bang.
- Discuss the Science: This experiment is a great demonstration of gas expansion and pressure. The dry ice turns from a solid to a gas, increasing the pressure inside the canister until the lid is forcefully ejected.
Sublimation Speedway
The “Sublimation Speedway” is a fun and educational experiment that demonstrates the principles of sublimation and friction using dry ice. It’s like creating a mini-hovercraft using dry ice, illustrating how a substance can rapidly change from a solid to a gas, creating a cushion of air that allows it to glide over surfaces.
Here’s how you can create your own Sublimation Speedway:
Materials Needed
- Dry ice
- A flat, smooth surface (like a kitchen counter)
- Heavy gloves and safety goggles (for handling dry ice)
- A few small, flat pieces of dry ice
- A protective barrier or designated safe area
Steps to Make a Sublimation Speedway
- Prepare the Dry Ice: Using gloves, shape the dry ice into small, flat pieces. Disk shapes work best as they will glide more smoothly.
- Create the Speedway: Clear a flat, smooth surface where the dry ice can glide freely. The surface should be level for the best effect.
- Initiate the Experiment: Place a piece of dry ice on the surface. Ensure it’s flat against the surface for optimal gliding.
- Observe the Gliding Action: Give the dry ice a gentle push. It should glide effortlessly over the surface. This is due to the layer of gas generated by the sublimation of dry ice, which creates a cushion that reduces friction.
- Explore and Experiment: Try using different sizes of dry ice pieces or different surfaces to see how it affects the movement. You can even set up obstacle courses to navigate.
The Science Behind It
- Sublimation: Dry ice is solid carbon dioxide and sublimates at room temperature, directly turning from a solid to a gas.
- Reduced Friction: The cushion of carbon dioxide gas reduces the friction between the dry ice and the surface, allowing it to glide smoothly.
The Singing Spoon
“The Singing Spoon” experiment is a simple yet fascinating demonstration of how vibrations can create sound, using dry ice as the primary material. This experiment illustrates the principle of sublimation and how it can generate vibrations in metal.
Here’s how to perform the “Singing Spoon” experiment:
Materials Needed
- Dry ice
- A metal spoon
- Heavy gloves and safety goggles (for handling dry ice)
- A flat surface (to place the dry ice on)
Steps to Make The Singing Spoon
- Safety Precautions: Always wear gloves and safety goggles when handling dry ice. Dry ice is extremely cold (-78.5°C or -109.3°F) and can cause frostbite if it comes into contact with skin.
- Prepare the Dry Ice: Place a chunk of dry ice on a flat surface. The dry ice should be stable and not slide around.
- Press the Spoon: Hold the metal spoon by the handle, wearing gloves for safety. Gently press the back (rounded side) of the spoon against the dry ice.
- Observe the Reaction: As you press the spoon against the dry ice, you should hear a loud, eerie singing or screeching sound. This sound is caused by the rapid sublimation of dry ice where the warm spoon touches it.
- Experiment with Pressure: You can change the pitch and volume of the sound by varying the amount of pressure you apply to the spoon. Light pressure may produce a lower volume, while more pressure can make a louder and higher-pitched sound.
Safety Tips
To perform these Dry ice Science Experiments, following precautions should be taken
- Handle dry ice with care to avoid burns or frostbite.
- Perform this experiment in a well-ventilated area to avoid the buildup of carbon dioxide.
- Be cautious of the volume of the sound, as it can be surprisingly loud.
- Supervise children closely if they are involved in the experiment.